Over the years and use, sofa lose firmness and cushions and backs end up sinking. When this happens, is it time to retire? Not always, in fact, you can still do a lot for him.
Time passes for everyone…
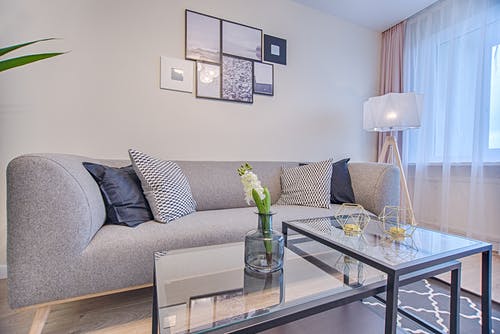
Even for your sofa. With time and wear, the sofa is not the most used home furniture in vain, the seat and back cushions lose firmness. Is it time, then, to buy a new one? Not always, if your sofa has a good frame or some unique feature, much can be done to recover it.
What if the structure is fail?
Well, you can also look to fix before buying a new sofa. In extreme cases you can even leave the wooden frame bare and, from there, upholster a completely new sofa.
The most comfortable fabrics
Another advantage of reupholstering your sofa is that you’ll be able to choose the most comfortable fabrics. It depends on the environment and the tastes of the client but there are excellent fabrics like cotton, linen or cotton-polyester.
Are you contemplating upholstering your sofa, but not sure where to start or what’s under that cover of outdated or worn fabric? In this article you will know 10 steps in the process of sofa upholstery.
If you prefer to let experts handle this, here at Brisbane Upholstery we pride ourselves in reupholstering well-made furniture and antiques. If you are looking for experts in upholstery in Brisbane you can be sure our team of professionals will repair, restore and recover your furniture.
Step 1 – Evaluation as upholstering a sofa
No matter how broken and dirty the fabric and upholstery of your sofa are, if you have solid “bones” (a sturdy frame) it is usually possible to restore. Check loose screws or bolts and separate glued joints, they can be repaired more frequently. Even cracked wood can be glued or replaced. The moving parts such as the tilting or rotating mechanisms are also replaceable.
Step 2 – Measurement
Once you have determined that the structure of your sofa is restorable, it is time to measure. Your new fabric is the most important and the most exciting part of your new look. When buying the fabric, you want, you must ensure that you have sufficient measures – without too much waste. Does your chair have a cushion or a tight seat or back? Does pose arms? These factors are taken into account when measuring.
Step 3 – Fabric Selection
Colour, texture and pattern are three variables that will be found in the realm of fabrics. Each lends a unique character to the surface. Collage, appliques and dyeing, are just some of the options available to spice up the unique character of a sofa.
Step 4 – Disarmed
Removing the old fabric cover is usually complicated and can be difficult and tedious. Some chair styles have decorative tacks to remove, while others (the lucky few) are upholstered with few easy-to-remove staples.
It is best not to remove the upholstery padding at this point unless there are foundation elements under the padding such as springs, straps or wooden platform that require attention. If you decide to remove it, keep it as best you can.
Step 5 – Cleaning, Repair and Finishing
Now that you have the piece stripped down to the spindles, so to speak or at least to your underwear, you are ready to clean the exposed metal parts of wood and / or, tighten or replace the screws or bolts, perform a renewal of the finish in wood.
Step 6 – Fill
Now is the time to reuse the original fill that you removed in step 4 – or request a new fill material, if the old fill is unusable. Here are three reasons to reuse the old fill, if it is entirely possible:
The old padding carries the imprint on the plot and defines the original shape of the chair.
Recycling old material makes your job easier to rebuild. Less things in the landfill and more savings.
Step 7 – Design and cut fabric
Cutting the new fabric is often the most fearsome step for upholstery students, the following guidelines will help ensure their success:
- Before making the first cut, make sure your design includes all the parts you need.
- Measure and label each piece with sticky notes or adhesive tape (always test before applying any type of tape to the fabric).
- Depending on the complexity of your project, you may want to use the original pieces of fabric for modelling.
- In general, your new pieces will be 4-6 inches larger than the dimensions of the original parts in each direction to allow stapling (sewn pieces will require less than this for seam allowances).
- Remember to measure twice and cut once. If in doubt about the shape of a difficult section, make a pattern of a piece of similar cheap cloth, before cutting into the final upholstery fabric.
Step 8 – Application of fabric to interior surfaces
When applying the new fabric cover to your sofa or armchair, you will start with the interior, or the surfaces that are in contact when you are sitting in your chair.
Most fabric joints will involve stapling the fabric to the frame or wood elements.
Step 9 – Application of the fabric to the exterior surfaces
After you securely staple the fabric on the interior surfaces of your furniture, it is time to work on the exterior fabric panels. If your chair has a leading edge attached to the front of the seat, place this first. The next step is the arms. And finally, the rear exterior.
Step 10 – Final Finish
The final gold brooch is the union of the black bottom fabric or “dust cloth” that is stapled to the bottom of the chair. The finish may also involve the application of decorative tacks.
Keep in mind that here at Brisbane Upholstery we can help you make your furniture look great according to the current trends.